Creating Solutions
Related Information
- A solution contains one or more pages. A page contains one or more media items.
- Pages play sequentially from top to bottom.
Operating Procedure
- On the Solutions, click New Solution and select a
solution type.
Solution types include regular solution, ultra-long-screen solution, and splicing screen solution.
Figure 1. Creating a solution 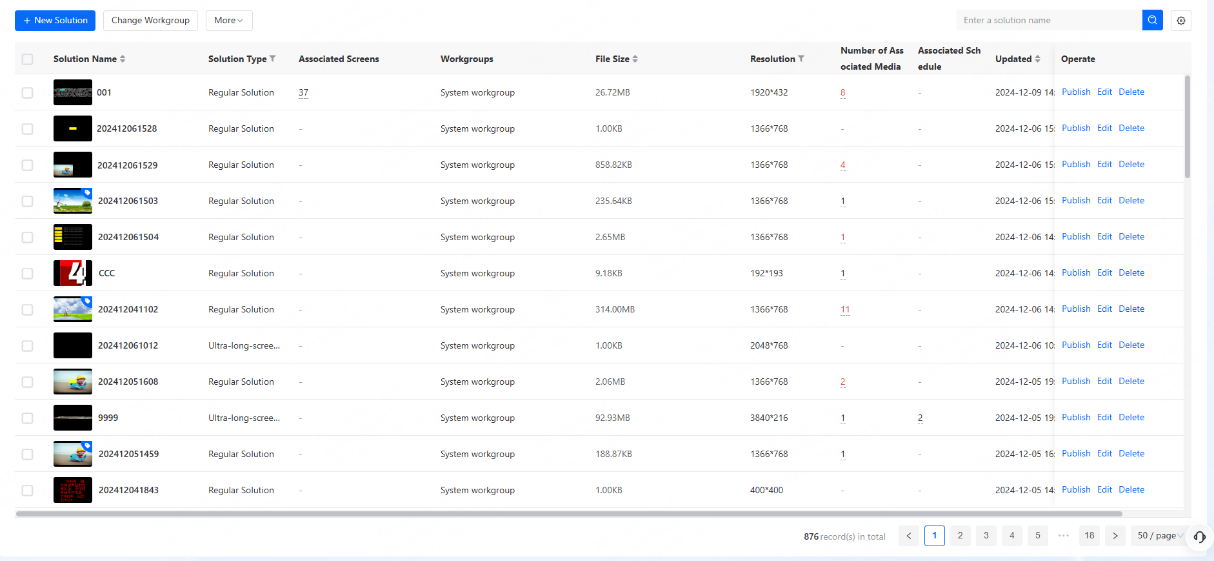
For the creation and publishing of ultra-long-screen solutions, there are firmware version limitations. The specific supported device models and versions are shown in the table below.
Series Device Models First Supported Version TB series TB10 Plus, TB20 Plus V4.7.6 TB30, TB40, TB50, TB60 V4.6.0 TN65 series TN65 V4.7.6 TCC series TCC160 V4.7.4 TU series TU15 Pro, TU20 Pro, TU4K Pro, TU40 Pro V1.5.0 Note:Other device models do not currently support ultra-long-screen solutions. For more details, please contact the technical support of NovaStar. - Specify a solution name and resolution, select associated solutions (optional), turn on
intelligent tag matching (optional), and click OK.
(Splicing screen solutions also require row and column settings.)
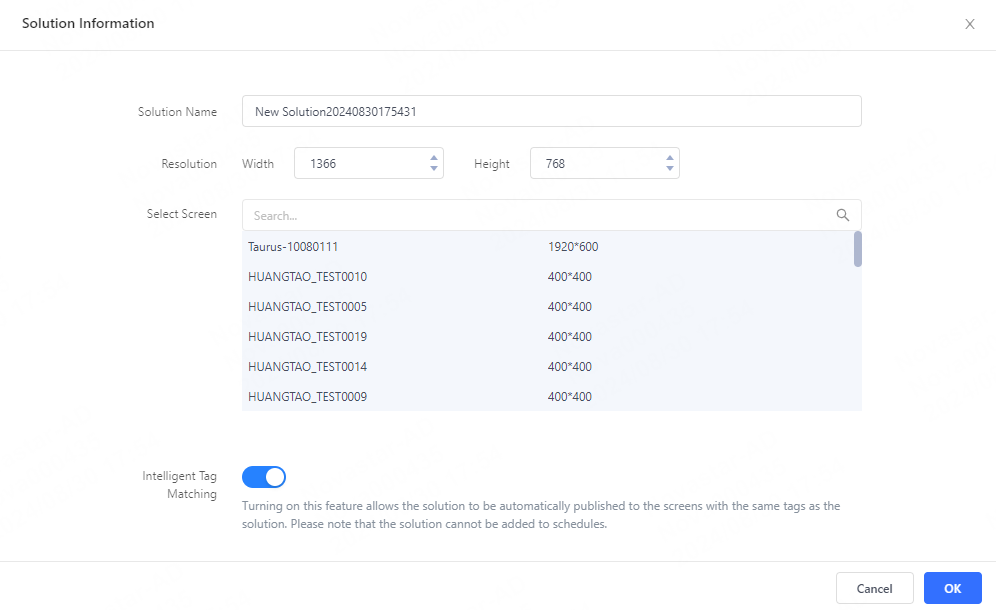
Note:- Only regular screen solutions support intelligent tag matching.
- Turning on intelligent tag matching allows a solution to be automatically published to the screens with the same tags as the solution. Please note that the solution cannot be added to schedules.
- When publishing a solution, users need to manually search screens by name. For the screens with the same name, further distinguish them by SN.
- Edit the solution on the solution editor.
After a solution is added, it can be immediately previewed in real time to ensure the content accuracy and playback effect.
Figure 2. Solution editor 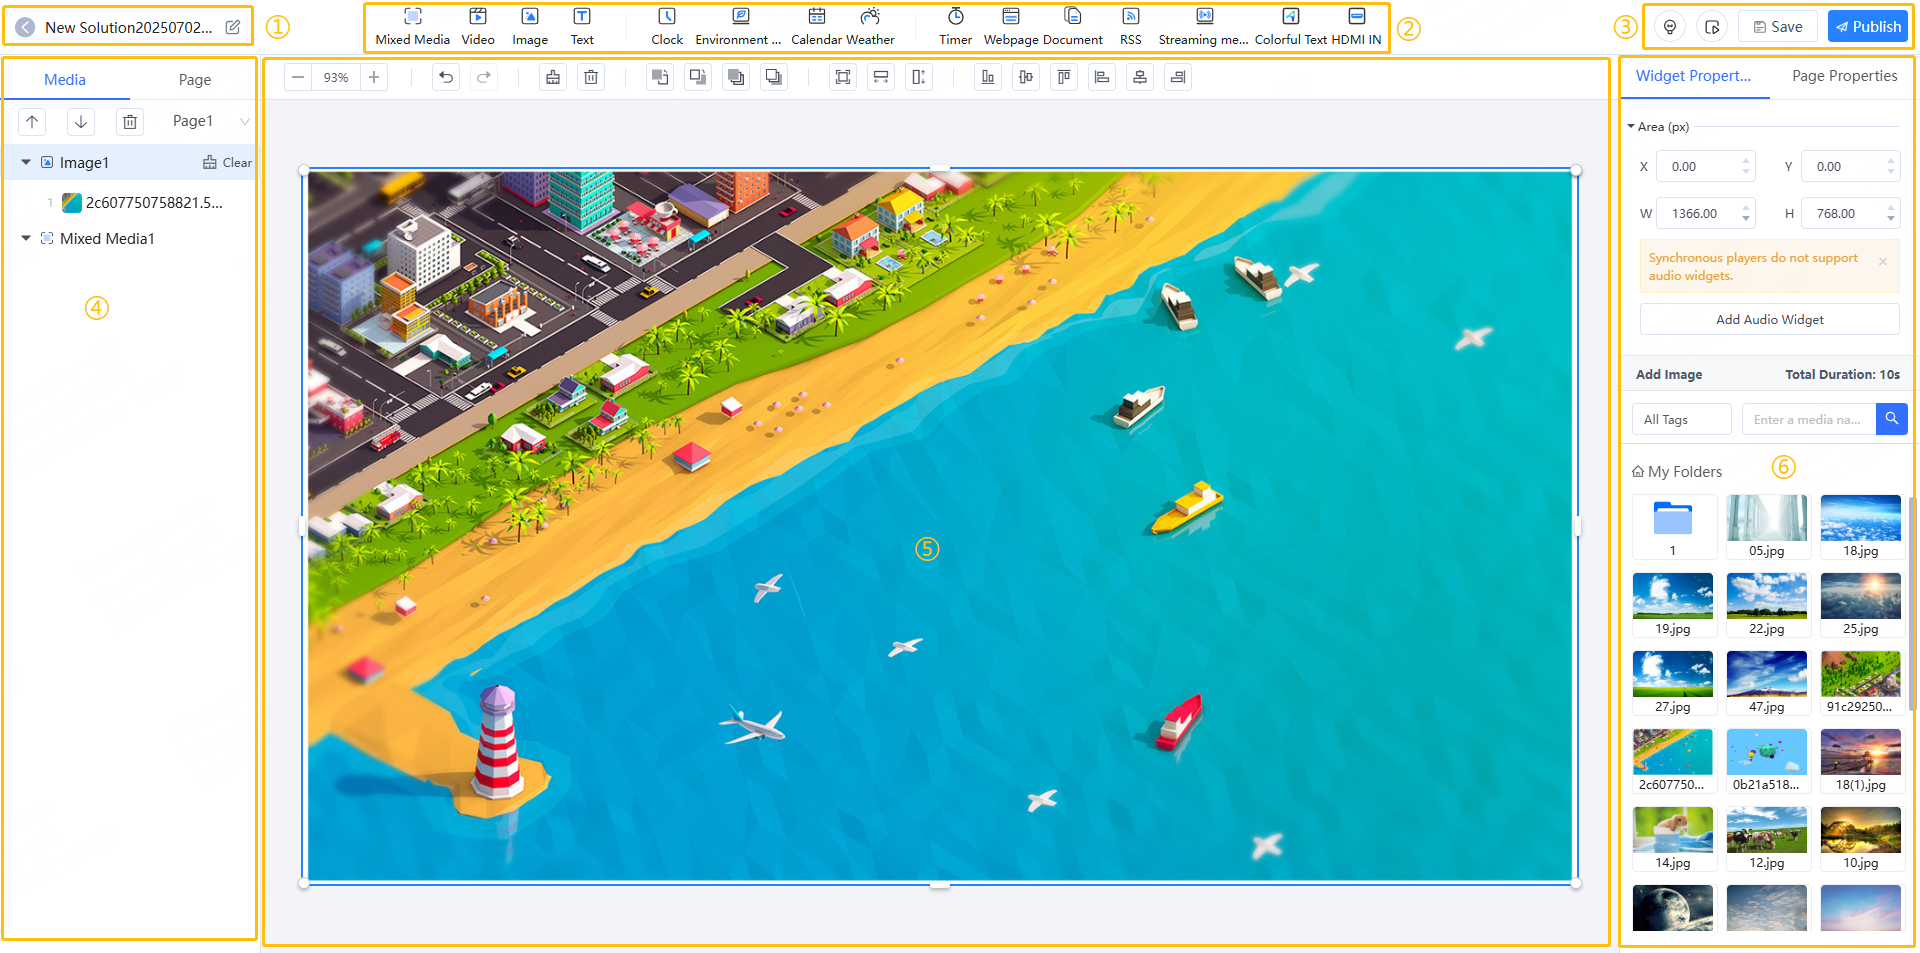
Table 1. Solution editor description No. Function Description 1 Set basic information View the solution type and name, edit the solution name and resolution, and select screens to be associated. 2 Add media Click a media icon to add the corresponding type of media to the page media editing area. 3 View beginner’s guide, and preview, save and publish solutions View beginner’s guide, and preview, save and publish solutions. 4 Edit media and pages Edit media and pages.
- Media: Adjust media order and
delete media.
- Click the up/down buttons or drag media to change the layer order.
- Media includes media types such as images, videos, mixed media, and documents, which can be adjusted in playback order by clicking the up/down buttons or manually dragging the media.
- Page: Add, copy and delete pages, and adjust the page order.
Pages play sequentially from top to bottom.
5 Edit page media Zoom pages in or out, delete media and change media layer order and layout. Batch operations are supported. A text widget can be added by double-clicking the blank area.
Users can copy media (including its properties) from other pages and paste the media to the current page.
6 Edit properties Edit the properties of widgets and the page.
- Widget properties: Widgets are the media items added to a page. The properties of different widgets vary. Select a widget before editing its properties.
- Page properties: Specify the validity range, play
count, and schedule for a page.
- Validity Range: If this option is selected, Start Date and End Date will be displayed. Expired pages will be skipped during solution playback.
- Times to Play: Specifies the number of times to play the page continuously.
- Schedule: Specifies the time and interval to play a page. If there are overlapping timeslots with other pages, the pages will play according to the page order from top to bottom.
- Media: Adjust media order and
delete media.