Creating Schedules
- On the Schedule, click Create at the bottom
left.
Figure 1. Creating a schedule 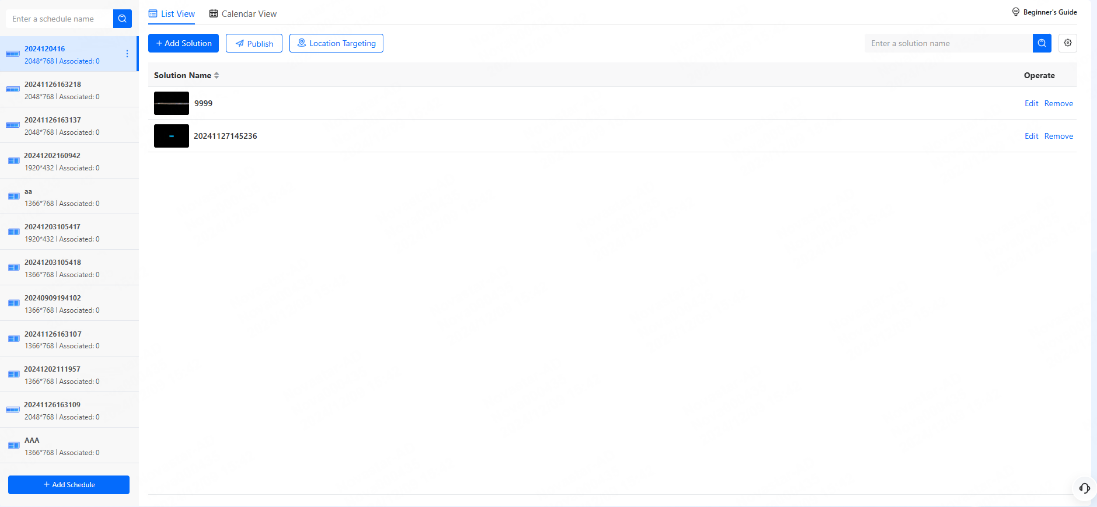
- Select a schedule type (regular-screen schedule or ultra-long-screen schedule)
- On the schedule information window, specify a name and resolution for the schedule, select
screens (optional), and click OK.
Figure 2. Schedule information 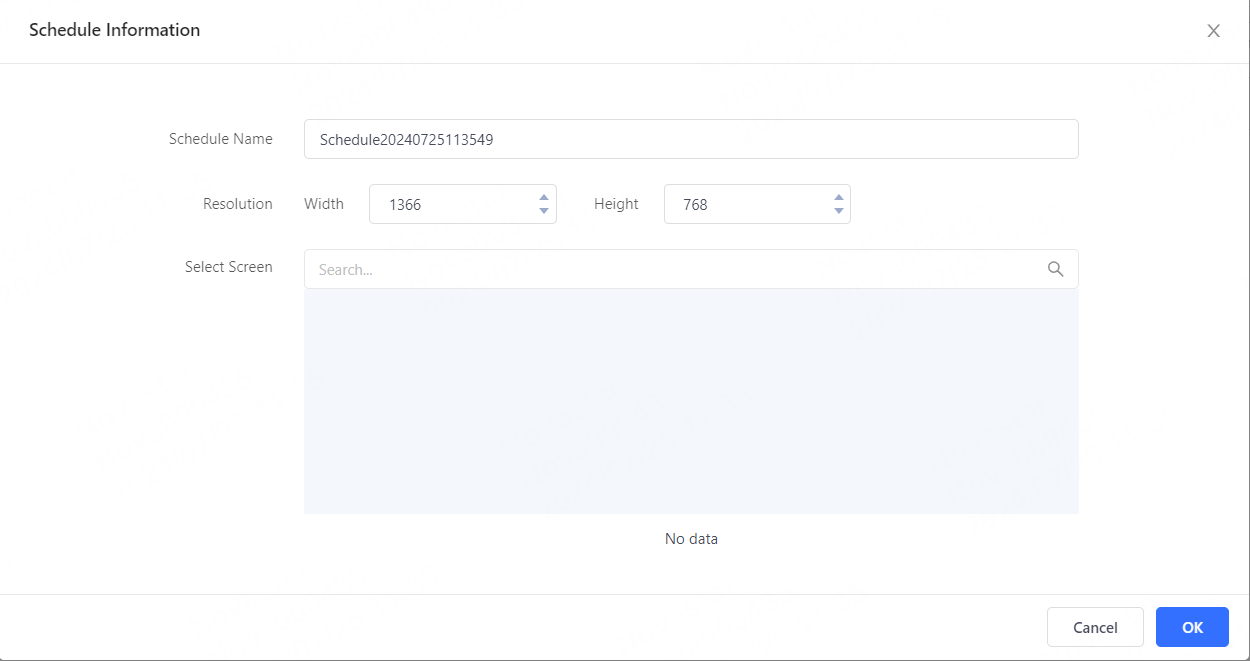
- On the Schedule page, click Add Solution.
Figure 3. Adding solutions 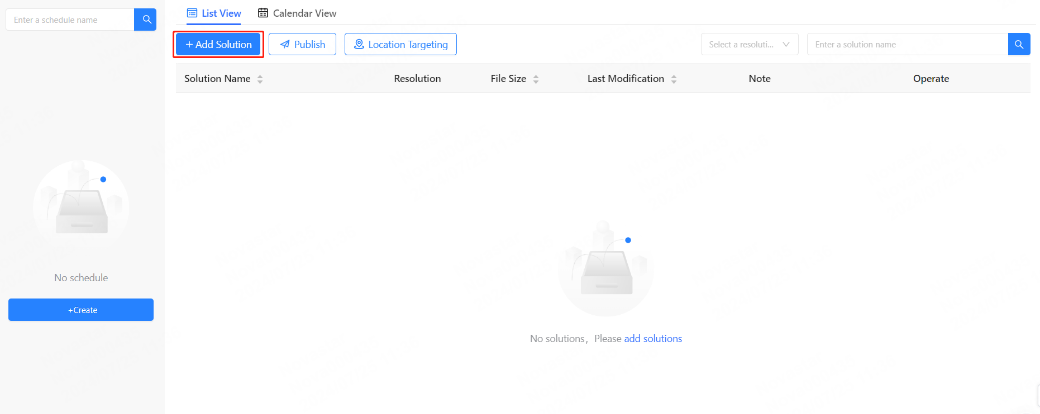
- Select one or more solutions and click OK.
Figure 4. Selecting solutions 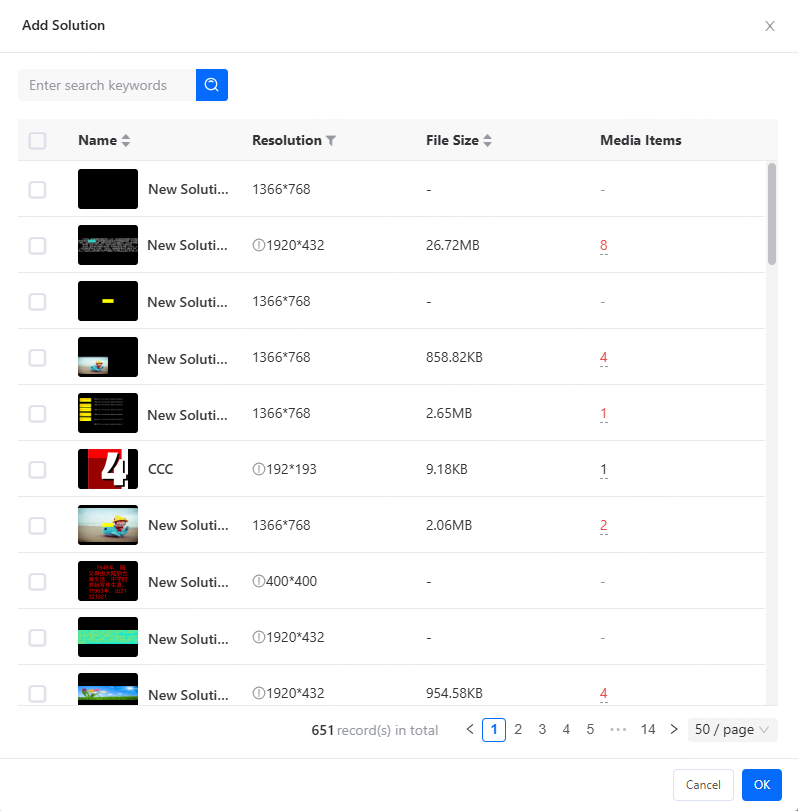
Note:
- Users can edit schedule information and delete schedules.
- Users can edit and remove the solutions in a schedule.