Scheduling Solutions
Operating Procedure
- From the menu bar, choose Schedule.
- Select a schedule on the left of the page.
- Select the Calendar View tab.
- Do any of the following to create a schedule.
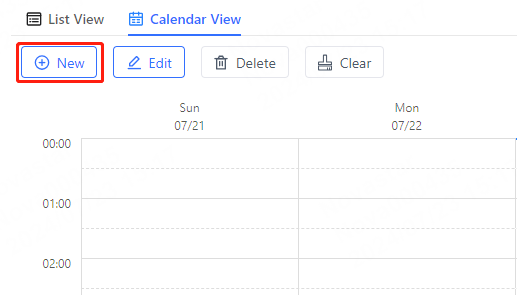
- Click New.
- Click a cell in the timetable and click +. (In
Day or Week view, each
cell in the timetable represents one hour. In
Month view, each cell in the timetable
represents one day.)
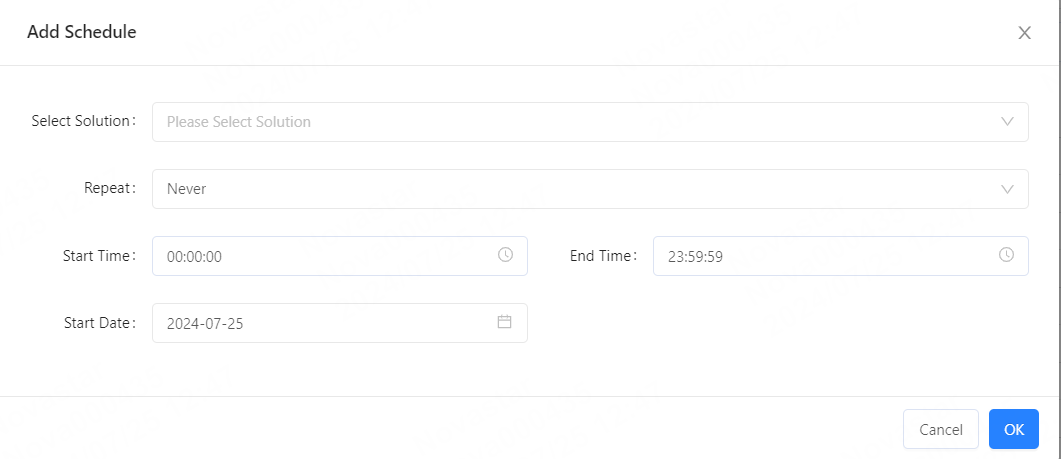
- On the Add Schedule window that appears, select s solution in the
schedule, specify a repeat method, playback start time, playback end time, and
start date.
- When Never is selected next to Repeat, if the specified date is today or the subsequent seven days, the solution will play according to schedule; if the specified date is beyond this range, the solution will not play.
- When Every day, Every
week, Every month, or
Every year is selected next to
Repeat, the solution will play according to
the selected repeat interval.
- After the settings are done, click OK.
The time frames are graphically displayed in the timetable.
- Do the following as needed:
- Drag the top or bottom edge of a time frame to make changes.
- Drag a time frame to any other position within the specified date to make changes.
- Adjust a time frame by dragging it to change its playback priority during overlapping time periods. The positions of time frames run from left to right, corresponding to a high to low priority. During overlapping periods, only the time frame with the highest priority will be played.
- Double click a time frame to open the Edit Schedule window.
- Edit schedule: Click a time frame and click Edit.
- Delete schedule: Click a time frame and click Delete.
- Clear schedule: Click Clear.
Note:
- When the solution resolution does not match the selected player resolution, it may cause the image to stretch and deform, affecting the playback effect.
- After a solution is published to an offline player. The solution will be published automatically after the player goes online.